
In this post will explained how to install the files provided by different online stores, and especially how to find then all the installed content in DAZ Studio 4.
Note
You can read this article to learn about some of the stores where buy or even download free content for your 3D scenes.
Table of Contents
Installation file types
Depending on the store where we bought and downloaded the installation files, we can have content delivered with an installer (DAZ 3D) or in zipped version (almost all the other stores).


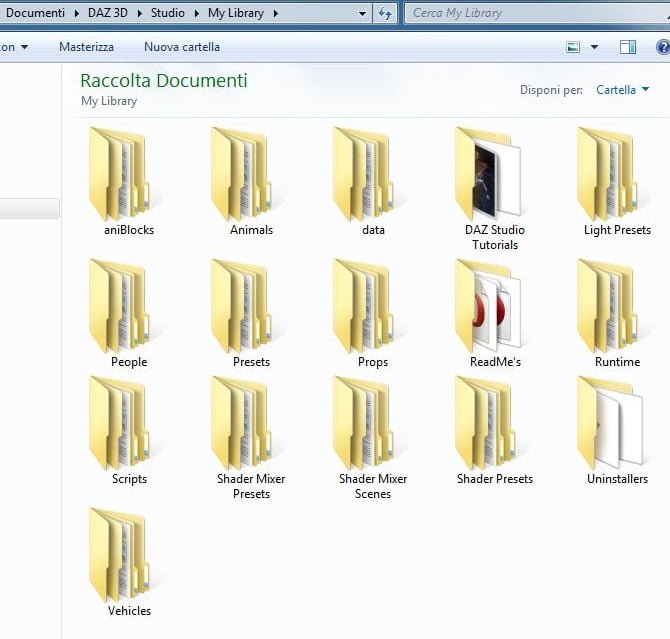
Where are installed the content in DAZ Studio 4?
Depending on the operating system, the default path where install the contents is as follows:
Windows 7 and Windows VistaC:/Users/YOUR ACCOUNT/Documents/DAZ 3D/Studio/My Library
Windows XPC:/Documents and Settings/YOUR ACCOUNT/Application Data/DAZ 3D/Studio/My Library
MacUsers/YOUR ACCOUNT/Documents/DAZ 3D/Studio/My Library.
Install files with installer and MetaData
Products in the DAZ store right now are provided with these installer.
We have, so, one or more installer for the content and one for the product metadata. This last is recognized by the word MetaData in the file name.
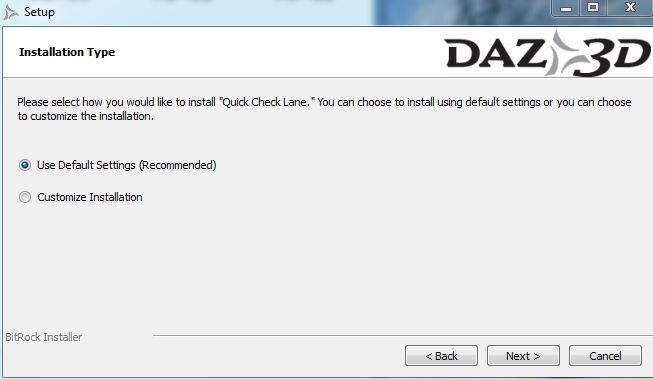
Run the installer and point the installation files towards the location of your My Library folder.
Note
💡 If you moved My Library folder to another location, you can select your path ticking on Customize Installation and then on Specify an installation path.

When installation is complete you can tick the box View ReadMe to view the creator notes and the installed file list with the relative path.
Now start DAZ Studio 4 and note that it will open a window that asks you to import the metadata for the content just installed.
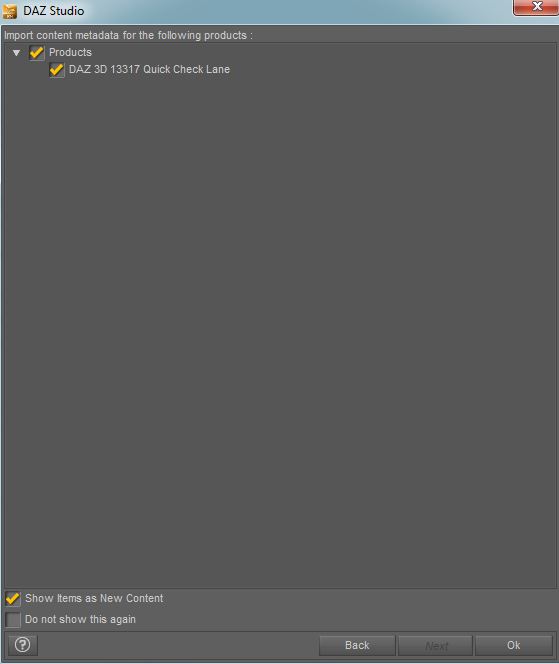
Click OK, and move to the Smart Content tab to view your new content. 💡 If you do not see anything on this tab, click on All in the upper left to view all the installed contents, or on any of the categories that you find below All to display the content associated.
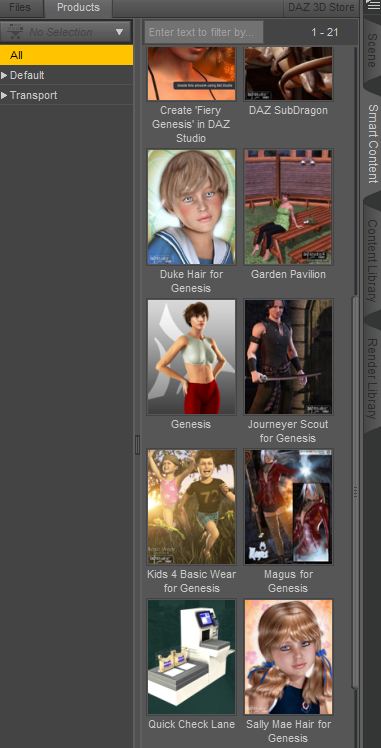
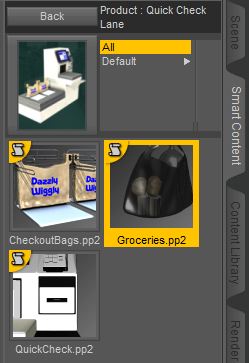
Double click on the image of the content to view all installed files.
Note
💡 If you have any figure or object selected in your scene, in the Smart Content tab will appear only content relative to that object or figure.
Install files without metadata
These are the files of the products marketed before summer 2011, prior to the release of DAZ Studio 4.
The installation procedure is identical to that already explained before. Even here at the end view the ReadMe to know the location of the files added to My Library folder.
Start DS4 now and move this time to the Content Library tab. So, go in search of new content with the help of the ReadMe.
Note
If you see Camera, Figures, Light, Materials, Pose or Props as file paths in ReadMe, look for your contents under Poser Formats.

Install ZIP files
To the product provided in compressed version you can simply unzip the folder, using a software that manages these files (such as 7-Zip or WinZip), and copy all the contents in the My Library folder.
Then in DAZ Studio you can proceed as explained above, by accessing the Content Library tab.
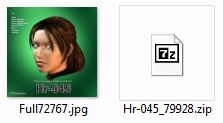
The installation files used in this guide are:

Leave a Reply